This week Jonathan chats with Nicholas Adams about OpenRiak! Why is there a Riak and an OpenRiak, which side of the CAP theorem does OpenRiak land on, and why is it so blazingly fast for some operations? Listen to find out!
Did you know you can watch the live recording of the show right on our YouTube Channel? Have someone you’d like us to interview? Let us know, or have the guest contact us! Take a look at the schedule here.
Well there’s your problem. (Credit: Mark Funeaux, YouTube)
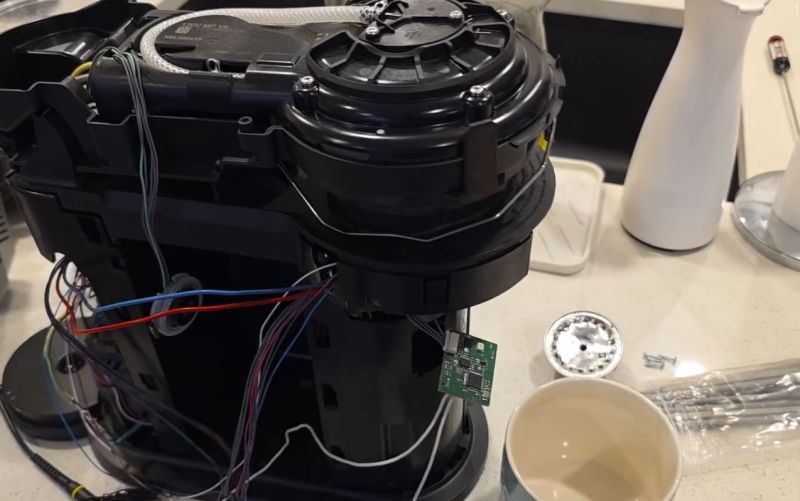
Akin to the razor-and-blades model, capsule-based coffee machines are an endless grind of overpriced pods and cheaply made machines that you’re supposed to throw out and buy a new one of, just so that you don’t waste all the proprietary pods you still have at home. What this also means is a seemingly endless supply of free broken capsule coffee makers that might be repairable. This is roughly how [Mark Furneaux] got into the habit of obtaining various Nespresso VertuoLine machine for attempted repairs.
The VirtuoLine machines feature the capsule with a bar code printed on the bottom of the lip, requiring the capsule to be spun around so that it can be read by the optical reader. Upon successful reading, the code is passed to the MCU after which the brewing process is either commenced or cruelly halted if the code fails. Two of the Vertuo Next machines that [Mark] got had such capsule reading errors, leading to a full teardown of the first after the scanner board turned out to work fine.
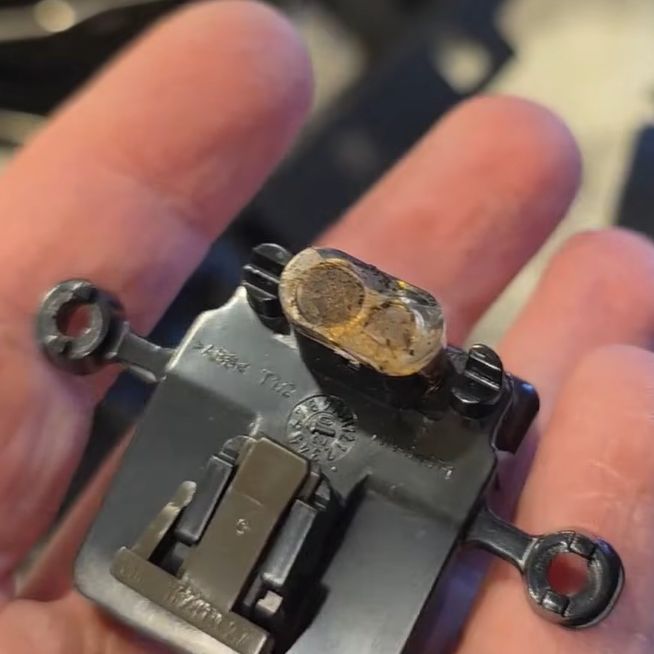
Long story short and many hours of scrubbed footage later, one machine was apparently missing the lens assembly on top of the photo diode and IR LED, while the other simply had these lenses gunked up with spilled coffee. Of course, getting to this lens assembly still required a full machine teardown, making cleaning it an arduous task.
Unfortunately the machine that had the missing lens assembly turned out to have another fault which even after hours of debugging remained elusive, but at least there was one working coffee machine afterwards to make a cup of joe to make [Mark] feel slightly better about his life choices. As for why the lens assembly was missing, it’s quite possible that someone else tried to repair the original fault, didn’t find it, and reassembled the machine without the lens before passing the problem on to the next victim.
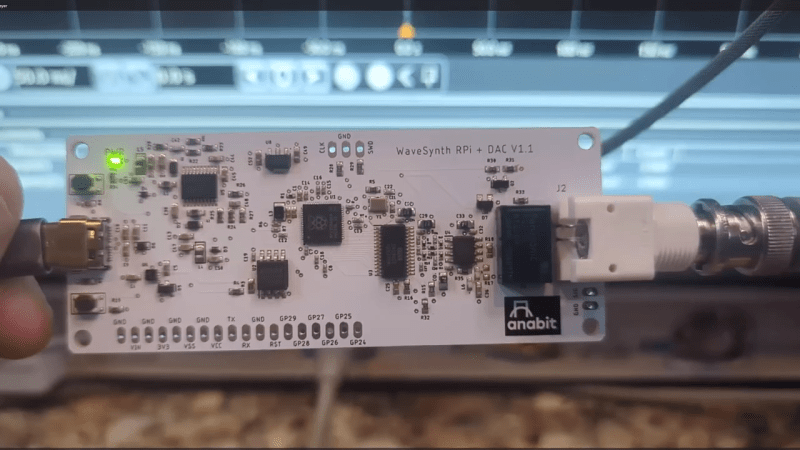
Normally, if you want to blast out samples to a DAC in a hurry, you’d rely on an FPGA, what with their penchant for doing things very quicky and in parallel. However, [Anabit] figured out a way to do the same thing with a microcontroller, thanks to the magic of the Raspberry Pi Pico 2.
The design in question is referred to as the PiWave 150 MS/s Bipolar DAC, and as the name suggests, it’s capable of delivering a full 150 million samples per second with 10, 12, or 14 bits of resolution. Achieving that with a microcontroller would normally be pretty difficult. In regular linear operation, it’s hard to clock bits out to GPIO pins at that sort of speed. However, the Raspberry Pi Pico 2 serves as a special case in this regard, thanks to its Programmable I/O (PIO) subsystem. It’s a state machine, able to be programmed to handle certain tasks entirely independently from the microcontroller’s main core itself, and can do simple parallel tasks very quickly. Since it can grab data from RAM and truck it out to a bank of GPIO pins in a single clock cycle, it’s perfect for trucking out data to a DAC in parallel at great speed. The Pi Pico 2’s clock rate tops out at 150 MHz, which delivers the impressive 150 MS/s sample rate.
The explainer video is a great primer on how this commodity microcontroller is set up to perform this feat in detail. If you’re trying for accuracy over speed, we’ve explored solutions for that as well. Video after the break.
One of the good things about simulating circuits is that you can easily change component values trivially. In the real world, you might use a potentiometer or a pot to provide an adjustable value. However, as [Ralph] discovered, there’s no pot component in LTSpice. At first, he cobbled up a fake pot with two resistors, one representing the top terminal to the wiper, and the other one representing the wiper to the bottom terminal. Check it out in the video below.
At first, [Ralph] just set values for the two halves manually, making sure not to set either resistor to zero so as not to merge the nets. However, as you might guess, you can make the values parameters and then step them.
By using .step you can alter one of the resistor values. Then you can use a formula to compute the other resistor since the sum of the two resistors has to add up to the pot’s total value. That is, a 10K pot will have the two resistors always add up to 10K.
Of course, you could do this without the .step and simply change one value to automatically compute both resistors if you prefer.
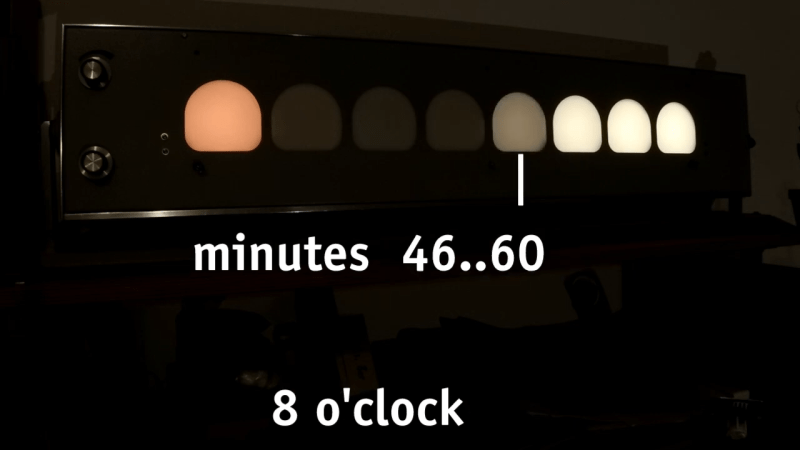
Creative clocks are a dime a dozen, even clocks that use binary have been created in nearly every format. [typo] promises a clever adaptation to the binary format, and it promises a more usable display. Using a combination of both traditional binary and digital gradients creates a usable and yet still nerdy fun clock.
[typo]’s clock fits the traditional binary counting method with the hours on the left side of its face. On the other hand, its right side presents a lighting gradient depending on the completion of the hour. While this is simple in principle, [typo] chose to correct what many don’t consider when deploying visual gradients. The human eye doesn’t see everything exactly as it is, which creates a rough logarithmic curve that gets corrected for in the binary/digital hybrid clock.
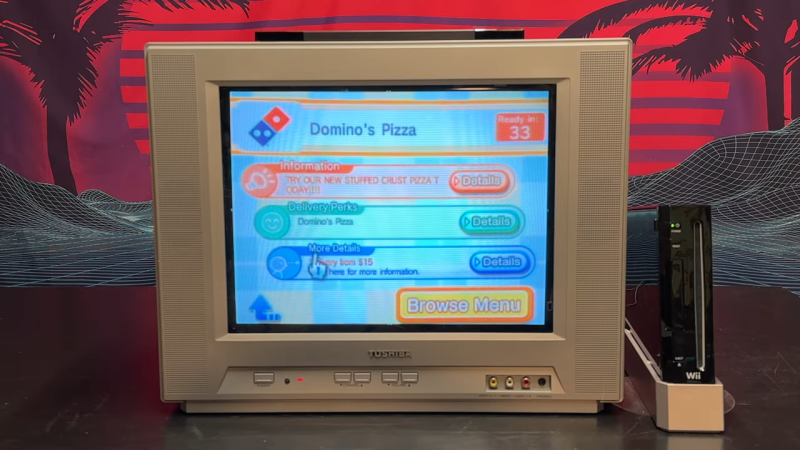
The Nintendo Wii first launched in 2006, and quickly became a fixture in living rooms around the world. It offered motion-controlled bowling, some basic internet features, and a pretty decent Zelda game. On top of all that, though, you could also use it to order a pizza, as [Retro Game Attic] demonstrates.
The Wii used to organize different features of the console into “channels.” Way back in the day, you could install the Demae Channel on your Wii in Japan, which would let you order fast food from various outlets using the Demaecan service.
The Demae Channel service was discontinued in 2017. However, it has since been resurrected by WiiLink, which is a homebrew project which replicates the functionality of the original Nintendo WiiConnect 24 and Wi-Fi Connection servers. As it stands, you can load the WiiLink version of the Demae Channel (or Food Channel) on to your Wii, and use it to order pizza from your local Domino’s Pizza. It only works in the United States and Canada right now, and there are no other restaurants available, at least until further development is completed to add JustEat compatibility. It’s not entirely clear how much of the functionality was recreated from the original Demae Channel; what is clear is that plenty of custom development has been done on the WiiLink version to integrate it with modern delivery services.
What’s so exciting about this is how well it actually works. The app perfectly nails the classic Wii Channel visual style. It also seems to integrate well with the Domino’s API for digital orders, even displaying simple updates on holiday opening hours and order times. Pricing data and images of the pizzas are all available right in the app, and you can even make modifications. It might be a gimmick… but it actually works. Notably, though, the app avoids any stickiness with handling payment—thankfully, pay-on-delivery is still legitimate in the pizza world in 2026.
Will this revolutionize how you order pizza on a daily basis? Probably not. Is it one of the coolest Wii hacks we’ve seen in a while? Undeniably. Video after the break.